What is Spinal Decompression?
We spend most of lives under the influence of gravity, both in sitting and standing positions, which causes compressive forces on the spine.
Over time, these effects can add up and eventually cause postural issues, low back pain, neck pain and more.
Spinal decompression can reverse this effect by gently creating space between the bones of the spine, reversing the daily effects of gravity on the spine. [8] This decompression can be done with the help of a clinician, a machine, or with simple at-home exercises that we will show you below.
Benefits of spinal decompression
- Creates a separation of the vertebral bones which can:
- Take pressure off the discs of the spine.
- Create more space for the nerves exiting the spine.
- These may lead to a decrease in pain level. [3]
- Moves the spine into the opposite direction of gravity. [1][3][4][8]
- Straightens spinal curves that are caused by gravity. [3][8]
- Decreases tension of muscles surrounding the spinal column. [3]
- Causes a combination of pulling-apart and gliding of the facet joints, which may improve blood flow in the region and aid in the healing of irritated and/or damaged structures in the area.
Should I be doing this at home?
Clinically, the patients we’ve seen who benefit most from spinal decompression are the ones who have low back pain due to poor posture and the ones who have low back pain that radiates down their leg. Additionally, if you have low back pain associated with numbness or tingling down your leg, this may be beneficial too.
What does the current research say?
- Overall, it is inconclusive.
- Some studies have found it can really help people with low back pain, while others say it has no effect.
- Research also shows no difference between exercises along with machine modulated decompression, and exercises alone. [2]
- In my experience, the exercises we will be going through below have been very helpful for my patients, however machine-modulated decompression hasn’t been as helpful.
Disadvantages/Contraindications
If you have been diagnosed with any of the following, consult your doctor before performing spinal decompression on your own: [3]
- Osteoporosis
- Degenerative joint disease
- Spinal Fracture
- Spinal fusion surgery
- Artificial disc placement in the low back (surgical procedure)
- Pregnancy
- Spinal nerve root impingement caused by:
- Herniated Disc
- Ligament encroachment
- Narrowing of the intervertebral foramen
- Osteophyte encroachment
- Spinal nerve root swelling
- Spondylolisthesis
- Joint hypomobility
- Extrinsic muscle spasm and muscle guarding
- Discogenic pain
- Joint pain
How to do Spinal Decompression at Home
We will again begin by saying that not all of these exercises are appropriate for everyone. If these exercise suggestions cause an increase in pain, or an increase in symptoms down the legs or arms, you should stop the exercise immediately.
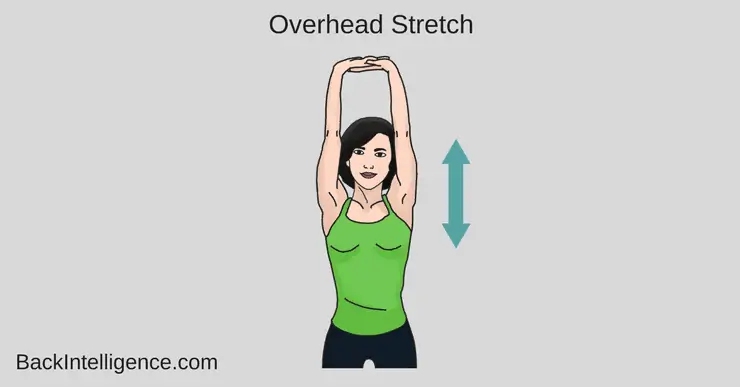
1. Overhead Stretch
• Begin by standing upright with your feet shoulder width apart
• Interlace your fingers, the bring your arms overhead, making your elbows completely straight
• Then reach toward the ceiling and hold the stretch 20-30 seconds
• Repeat 4-5x, multiple times a day
The Complete Posture Fix (With Dr. Oliver)
Fix your Rounded shoulders & Fwd Head posture, get out of pain and increase your mobility.
Learn More
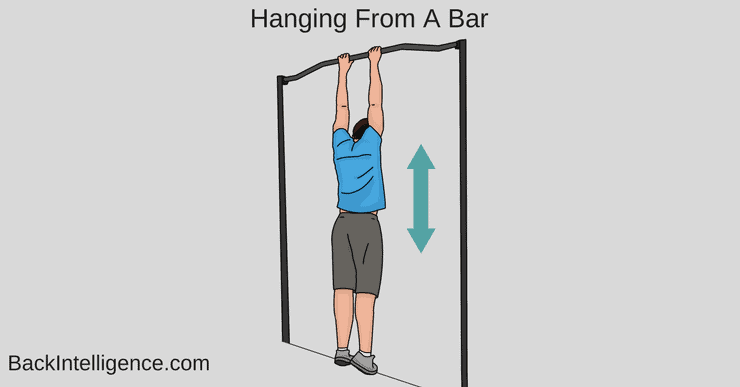
2. Bar Hang
• You can use a pull-up bar, sturdy playground equipment, or whatever sturdy high bar you have on hand.
• Reach up and hold on to the bar (you may need to use a small step if it is too difficult to reach).
• Slowly begin to hang on the bar and let more and more of your body weight hang.
• Again, try to relax into this position and take a few deep breaths.
• Hold for 20-30 seconds or whatever is comfortable for you.
• Repeat 2-3 times, several times a day.
• If you have shoulder pain with this, do not perform it.
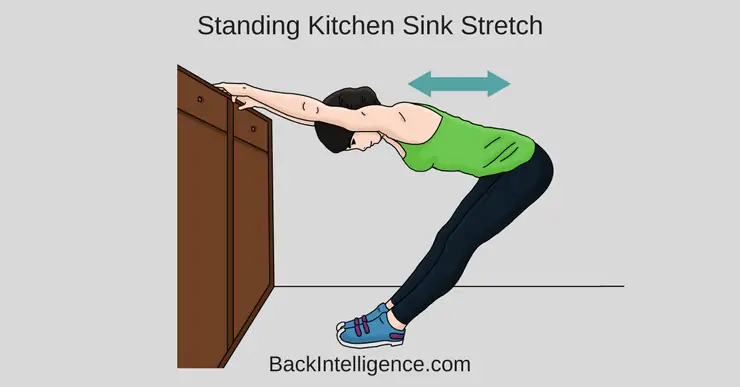
3. Standing Kitchen Sink Stretch
• Begin by finding a sturdy surface you can hold onto. I typically have my patients do this at the kitchen sink.
• While holding onto the surface, slowly lean back and completely straighten your elbows.
• At this point, you should be leaning all of your weight back behind you.
• Stay in this position for 20-30 seconds, take deep breaths, and try to relax into the position.
• Repeat 2-3x, as much as needed throughout the day.
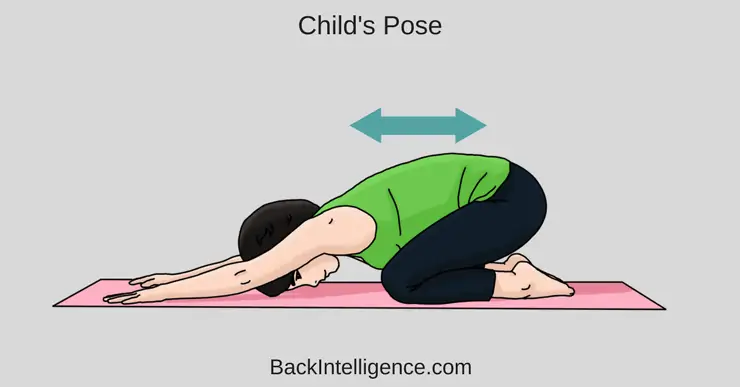
4. Prayer Stretch
• Begin on your hands and knees.
• Sit back so your bottom is touching your heels.
• Then reach out with both arms in front of you on the floor and relax into this position.
• Hold here for 10 seconds.
• Repeat the same steps, however now reach your arms slightly to the left, then slightly to the right (holding for 10 seconds in each position).
• Repeat each direction (forward, left side, right side) 3 times.
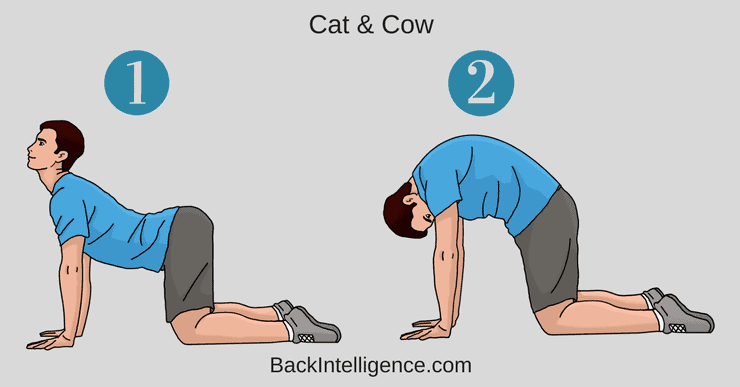
5. Cat Cow Stretch
• Begin by getting on your hands and knees
• Make sure your knees are directly underneath your hips and your hands are directly underneath your shoulders
• Slowly arch your back (like an “angry cat”) as far as you can while moving your head down towards the floor (like you’re trying to look at your knees)
• Return to the start position, then let your back sag down towards the floor while looking up toward the ceiling
• Repeat 20-30x, multiple times a day
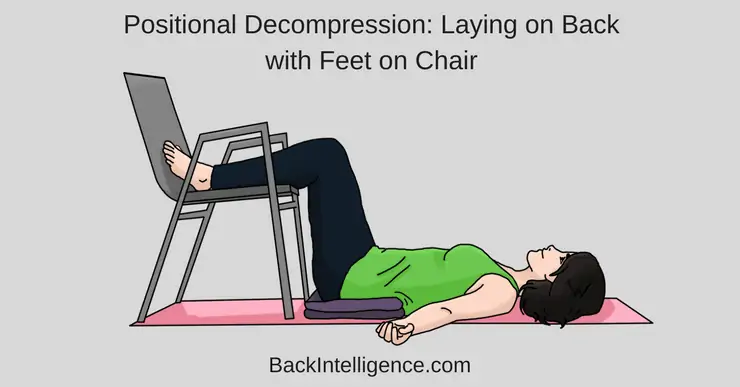
6. Positional Decompression: Laying on Back with Feet on Chair
This is not so much an exercise but rather a position that I often have patients assume if they are having severe pain and are unable to relieve it with other techniques. While this is not true decompression, it will still take some stress off the lumbar area.
• Begin by getting on the floor (if you feel comfortable)
• Position a chair next to you
• Lay on your back and place your lower legs on the chair, with the edge of the chair positioned on the back of your knees.
• Relax in this position for at least 5 minutes, but you can stay here as long as you feel comfortable.
7. Inversion Table
While inversion tables are an option for spinal decompression, it should be mentioned that there is little to no evidence supporting the effectiveness of these tables. [6] I also haven’t seen many of my patients have success with these tables, so I cannot strongly recommend them.
The best advice may be that if you attempt using a table like this and feel like it doesn’t do anything for you, then don’t use it. If you use it and it really helps, then continue to use it.
You should NOT use an inversion table if you have:
• Blood pressure control issues (uncontrolled high blood pressure, orthostatic hypotension)
• Hernia
• Glaucoma
• Dizziness
• Osteoporosis, bone fractures
• Arterial insufficiency in legs
• Cardiovascular problems
How to Use It:
• Follow the instructions for your individual table.
• In general, make sure your feet/legs are completely secured, then slowly begin to tip the table backwards.
• Continue to tip backwards as far a tolerable, then hold this position for as long as comfortable.
• Aim for 5-10 minutes, however you may require rest breaks in that time.
• If this makes you feel very dizzy or light-headed, don’t use the table.
Learn More
Also, Try Self Massage!
Check out these 9 Self massage techniques
[1] Kang J, Jeong D, Choi H. Effects of spinal decompression on the lumbar muscle activity and disk height in patients with herniated intervertebral disk. J Phys Ther Sci. 2016;28(11):3125-3130. doi:10.1589/jpts.28.3125
[2] Thackeray A, Fritz J, Childs J, Brennan G. The Effectiveness of Mechanical Traction Among Subgroups of Patients With Low Back Pain and Leg Pain: A Randomized Trial. Journal of Orthopaedic & Sports Physical Therapy. 2016;46(3):144-154. doi:10.2519/jospt.2016.6238
[3] Saunders H. Lumbar Traction. Journal of Orthopaedic & Sports Physical Therapy. 1979;1(1):36-45. doi:10.2519/jospt.1979.1.1.36
Received her Doctorate in physical therapy from Rutgers University in 2016. Since graduation she has been working mostly with outpatient orthopedics. She says: “I believe that if you can move freely and pain-free throughout your life, you can live life to it’s fullest. As a Certified Strength and Conditional Specialist and a CrossFit coach, I believe that physical abilities are directly correlated with quality of life.”
